honeywell th6210u2001 installation manual
Package Contents and Accessories
The Honeywell TH6210U2001 package includes the T6 Pro Thermostat‚ UWP Mounting System‚ Junction Box Adapter‚ and an optional Decorative Cover Plate for a clean installation;
1․1․ T6 Pro Thermostat Overview
The Honeywell TH6210U2001 T6 Pro Thermostat features a 5․44 square-inch backlit touchscreen display for easy navigation and programming․ Designed for compatibility with heat pumps‚ furnaces‚ and central air systems‚ it supports single- or two-stage heating and cooling․ The thermostat operates on 24VAC power and includes advanced scheduling options for energy efficiency․ Its sleek design blends functionality with modern aesthetics‚ ensuring seamless integration into any home environment while maintaining precise temperature control․
1․2․ UWP Mounting System Details
The UWP Mounting System is included in the Honeywell TH6210U2001 package for secure thermostat installation․ It allows mounting on a wall or electrical junction box‚ ensuring a stable and level setup․ The system includes necessary hardware and adapters‚ simplifying the installation process․ An optional Decorative Cover Plate is also provided to cover any paint gaps‚ ensuring a clean and professional finish․ This system ensures proper alignment and secure fastening of the thermostat․
1․3․ Junction Box Adapter and Cover Plate
The Junction Box Adapter is designed for mounting the Honeywell TH6210U2001 thermostat directly to an electrical junction box or wall․ It ensures a secure and level installation․ The Decorative Cover Plate is optional and can be used to cover any paint gaps left by a previous thermostat․ Simply separate the adapter from the cover plate and install them as needed for a clean‚ professional appearance․
Installation Instructions
Start by turning off power to your HVAC system․ Remove the old thermostat and label wires․ Follow the step-by-step guide in the manual for a smooth installation․
2․1․ Pre-Installation Preparation
Before starting‚ ensure the HVAC system is turned off at the circuit breaker․ Remove the old thermostat and label the wires for identification․ Verify compatibility with your HVAC system‚ such as heat pumps or furnaces․ Gather tools like a screwdriver and wire strippers․ Check the package contents and ensure all accessories are included․ Turn off power to the system at the breaker box for safety․
2․2․ Compatible HVAC Systems Identification
The Honeywell TH6210U2001 is compatible with various HVAC systems‚ including heat pumps‚ furnaces‚ and central air conditioning units․ It supports multi-stage systems‚ accommodating up to two heating and cooling stages for enhanced efficiency․ Ensure your system matches these specifications for proper functionality and optimal performance․
2․3․ Step-by-Step Installation Process
Begin by turning off the power to your HVAC system․ Remove the old thermostat and label the wires for identification․ Install the Junction Box Adapter if needed‚ ensuring it is securely mounted․ Attach the T6 Pro Thermostat to the adapter‚ aligning it properly․ Connect the wires to their respective terminals‚ following the manual’s wiring guide․ Finally‚ restore power and test the system to ensure it operates correctly․
Wiring and Terminal Connections

The Honeywell TH6210U2001 requires connecting wires to specific terminals: R (24VAC power)‚ Rc (cooling)‚ Y (compressor)‚ and handling the common wire (C terminal) properly․ Use the slider tab if only one R wire is present․
3․1․ Terminal Designations Explained
The Honeywell TH6210U2001 thermostat has specific terminal designations:
– R: 24VAC power from the heating transformer․
– Rc: 24VAC power from the cooling transformer․
– Y: Compressor contactor connection․
– W: Heating stage (e․g․‚ furnace or heat pump)․
– G: Fan relay for blower control․
– C: Common wire (required for proper operation)․
Use the slider tab to connect R and Rc if only one R wire is present․
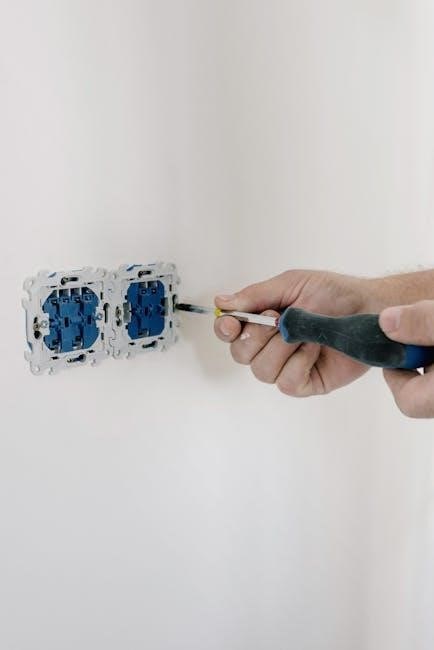
3․2․ Connecting Wires to Terminals
When connecting wires to the Honeywell TH6210U2001 thermostat‚ ensure the power is off; Match each wire to its corresponding terminal based on your HVAC system․ For example‚ connect the R wire to the heating transformer and the Y wire to the compressor contactor․ Use the slider tab to join R and Rc if only one power wire is present․ Secure all connections firmly to avoid loose wiring․
3․3․ Handling the Common Wire (C Terminal)
The common wire (C terminal) provides a continuous 24VAC power supply to the thermostat․ If your system requires a common wire‚ connect it to the C terminal․ Ensure the connection is secure to maintain proper power supply․ If unsure‚ consult the wiring diagram or contact a professional for assistance․ Proper installation ensures safe and reliable thermostat operation․
Mounting the Thermostat
Mount the Honeywell TH6210U2001 using the Junction Box Adapter for secure installation․ Ensure the thermostat is level and properly aligned for accurate temperature sensing and operation․
4․1․ Using the Junction Box Adapter
The Junction Box Adapter ensures secure mounting to an electrical box or wall․ Detach the adapter from the Cover Plate and position it over the junction box․ Secure it using screws provided․ Ensure the adapter is level for proper thermostat alignment and operation․ This step is crucial for maintaining accurate temperature control and system compatibility․
4․2․ Ensuring Proper Leveling
Proper leveling is essential for accurate temperature control and system performance․ Use a spirit level to ensure the thermostat is perfectly horizontal․ Adjust the mounting screws as needed to achieve balance․ Misalignment can cause temperature sensing errors‚ so double-check the level before finalizing the installation․ This ensures reliable operation and optimal heating or cooling performance from your Honeywell T6 Pro Thermostat․
4․3․ Optional Cover Plate Installation
The optional Decorative Cover Plate enhances the thermostat’s appearance and covers any paint gaps from the previous installation․ Separate the Junction Box Adapter from the Cover Plate‚ if necessary․ Mount the adapter first‚ then align the Cover Plate with the thermostat․ Gently snap it into place to ensure a secure and flush installation․ This step is ideal for concealing wall imperfections while maintaining a sleek‚ professional finish․
Programming and Configuration
Program the Honeywell TH6210U2001 to set schedules‚ adjust temperatures‚ and customize settings for optimal HVAC performance․ Configuration options allow tailored temperature control and energy efficiency․
5․1․ Setting Up Time and Date
Access the menu by pressing the “Menu” button‚ then navigate to “Settings” to configure the time and date․ Select your time zone‚ adjust the current time‚ and set the date․ Use the touch screen interface to ensure accuracy․ Proper time and date settings are essential for scheduling and maintaining consistent HVAC operation․ Save changes to complete the setup․
5․2․ Creating a Temperature Schedule
Access the menu by pressing the “Menu” button‚ then select “Schedule Settings” to create a temperature schedule․ Choose the desired temperature for different times of the day (e․g․‚ wake‚ leave‚ return‚ sleep)․ Use the touch screen to adjust settings for each period․ Save your preferences to activate the schedule․ Ensure the schedule aligns with your daily routine for optimal energy efficiency and comfort․ Review and modify as needed․
5․3․ Adjusting Advanced Settings
Access advanced settings by navigating to the “Menu” and selecting “Advanced Settings․” Adjust temperature limits‚ swing settings‚ and fan controls to optimize performance; Use the touchscreen to modify parameters like cycle rate and temperature differential․ Ensure settings align with your HVAC system’s capabilities․ Save changes to maintain customized preferences․ Proper adjustments enhance comfort and efficiency without compromising system functionality․
Troubleshooting Common Issues
Check for loose wires‚ incorrect terminal connections‚ or power issues․ Reset the thermostat by turning power off and on․ Ensure proper wiring and configuration match your HVAC system for reliable operation․
6․1․ Common Installation Mistakes
Incorrect wire connections‚ such as mismatched terminals or forgetting the common wire‚ are frequent issues․ Improper system compatibility checks can lead to operational problems․ Ensure correct identification of HVAC systems like heat pumps or furnaces․ Failure to level the thermostat or not following the power-on sequence can also cause malfunctions․ Always double-check wiring and system configuration before powering up․
6․2․ Solving Connectivity Problems
Connectivity issues often arise from improper wiring or power supply problems․ Ensure the thermostat is connected to the correct HVAC system and power source․ Check for stable Wi-Fi connection if smart features are used․ Verify terminal connections‚ especially the common wire (C terminal)‚ and ensure the system is compatible․ Restarting the thermostat or router may resolve temporary connectivity glitches․ Consult the manual or contact support for persistent issues․
6․3․ When to Contact Professional Support
Contact professional support if you encounter complex wiring issues‚ system incompatibility‚ or persistent malfunctions after troubleshooting․ Seek expert help for advanced HVAC system configurations or if safety concerns arise․ Honeywell support specialists can resolve issues beyond basic troubleshooting‚ ensuring proper installation and functionality․ Don’t hesitate to reach out for assistance with unique system setups or when DIY solutions aren’t sufficient to resolve the problem․
Compatibility with HVAC Systems
The Honeywell TH6210U2001 is compatible with heat pumps‚ furnaces‚ and central air conditioning systems‚ supporting both single-stage and multi-stage HVAC configurations for flexible temperature control․
7․1․ Heat Pumps and Furnaces
The Honeywell TH6210U2001 is designed to work with heat pumps and furnaces‚ including single-stage and multi-stage systems․ For backup heat‚ a 3-stage system is required․ The thermostat supports Y (compressor)‚ W (heat)‚ and R/Rc (24VAC power) terminals‚ ensuring compatibility with most HVAC setups․ Proper wiring is essential for accurate temperature control and system performance․
7․2․ Central Air Conditioning Systems
The Honeywell TH6210U2001 is compatible with central air conditioning systems‚ supporting both single-stage and multi-stage cooling․ Proper wiring is crucial‚ with the Y terminal connecting to the compressor contactor and R/Rc terminals providing 24VAC power․ The thermostat ensures precise temperature control and efficient operation when connected to compatible central AC systems‚ making it a versatile choice for various HVAC configurations․
7․3․ Multi-Stage System Requirements
The Honeywell TH6210U2001 supports multi-stage HVAC systems‚ requiring specific terminal connections for proper operation․ For multi-stage cooling‚ connect Y1 and Y2 terminals‚ while W1 and W2 handle multi-stage heating․ Ensure the 24VAC power is correctly supplied to R or Rc terminals․ Proper configuration of these connections and settings is essential for efficient multi-stage system performance and compatibility․
Safety Precautions
Safety Precautions: Always turn off power to the HVAC system before installation․ Avoid handling electrical components without proper protection․ Ensure the thermostat is installed by a qualified technician to prevent damage or malfunction․ Follow all local electrical codes and regulations․ Properly dispose of the old thermostat‚ especially if it contains mercury or other hazardous materials․
8․1․ Handling Electrical Components Safely
Safety First: Always disconnect power to the HVAC system before handling electrical components․ Use insulated tools to prevent shock․ Avoid touching live wires or terminals․ Ensure proper grounding and follow local electrical codes․ Never work on the system while it is energized․ If unsure‚ consult a licensed electrician to prevent accidents or damage to the thermostat or HVAC system․
8․2․ Avoiding Damage to the Thermostat
Protect Your Thermostat: Handle the device gently to prevent physical damage․ Avoid exposing it to moisture or extreme temperatures․ Mount securely without over-tightening‚ and keep the display clean with a soft cloth; Never force wires into terminals‚ as this can cause permanent damage․ Ensure proper installation to maintain functionality and prevent costly repairs․ Regularly inspect for dust or debris buildup‚ which can affect performance․
8․3․ Proper Disposal of Old Thermostat
Eco-friendly Disposal: Always dispose of your old Honeywell TH6210U2001 thermostat responsibly․ Check local regulations for electronic waste recycling options․ Remove any batteries and sensitive components․ Do not discard in regular trash to prevent environmental harm․ Recycle through approved facilities or manufacturer programs․ Ensure all personal settings are erased for privacy before disposal․
Additional Resources
Download the User Manual: Visit Honeywell’s official website for the TH6210U2001 manual․ Access online guides‚ troubleshooting tips‚ and video tutorials for installation and programming support․
9․1․ Downloading the User Manual
To download the Honeywell TH6210U2001 user manual‚ visit Honeywell’s official website․ Search for “TH6210U2001” to find the PDF manual․ Ensure compatibility with your device․ Follow on-screen instructions to download and save the file․ Refer to the manual for detailed installation‚ programming‚ and troubleshooting guidance․ Additional resources‚ like video tutorials‚ are also available for comprehensive support․
9․2․ Accessing Online Support and Guides
Visit Honeywell’s official website to access online support and guides for the TH6210U2001․ Navigate to the support page for detailed installation guides‚ troubleshooting tips‚ and FAQs․ You can also find video tutorials and interactive resources to assist with setup and programming․ Additional resources include compatibility charts and technical specifications to ensure optimal performance of your thermostat․
9․3․ Video Tutorials for Installation
Honeywell provides video tutorials on their official website and YouTube channel to guide you through the installation process․ These tutorials cover step-by-step instructions for wiring‚ mounting‚ and configuring the TH6210U2001 thermostat․ They are designed to help users of all skill levels‚ ensuring a smooth and successful installation experience․ Videos are available 24/7 for convenient access and repeat viewing as needed․